 Lyztin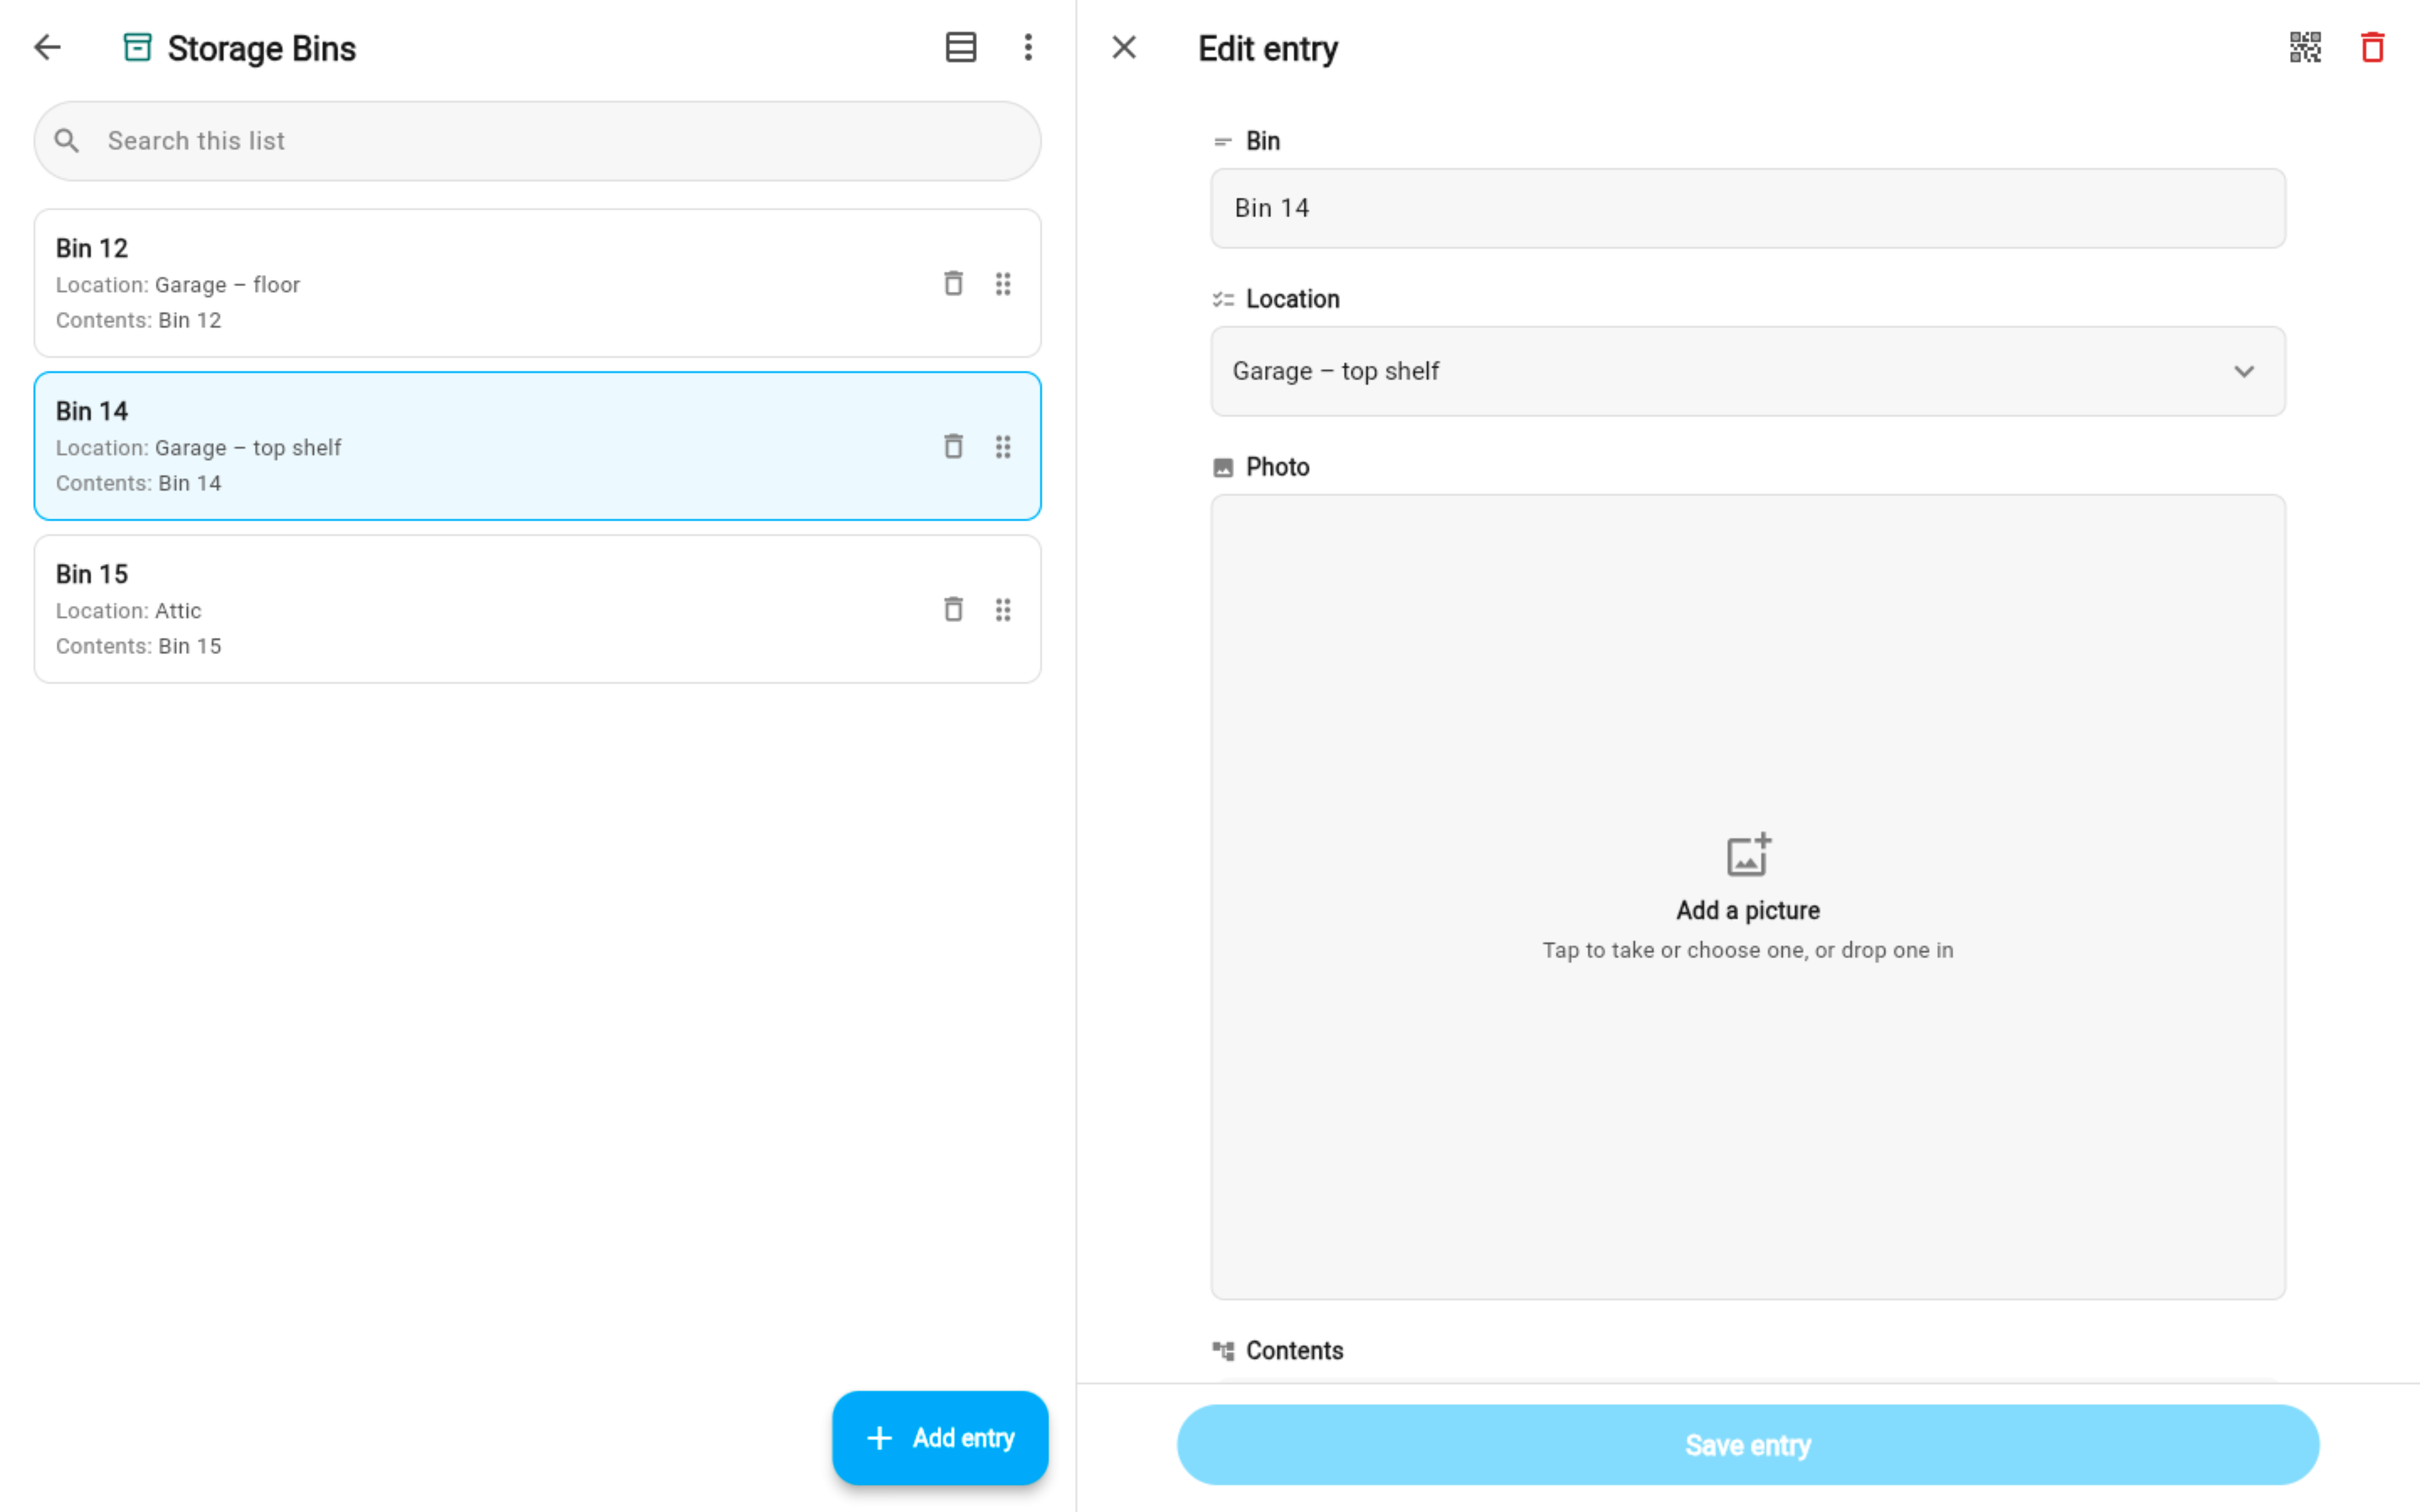
What we are building
A list called Storage Bins where every entry is one physical bin. Each entry has a photo of the bin, where it lives, and — this is the part that makes it work — its own list of what is inside. Every bin gets a printed QR label. Scanning the label opens that bin's entry. Searching for “Christmas lights” tells you which bin to pull.
The whole thing rests on two Lyztin features: a List field, which lets one entry hold a whole list of its own, and QR labels, which address one entry by a code you can stick to a box.
Step 1: Make the Bins list
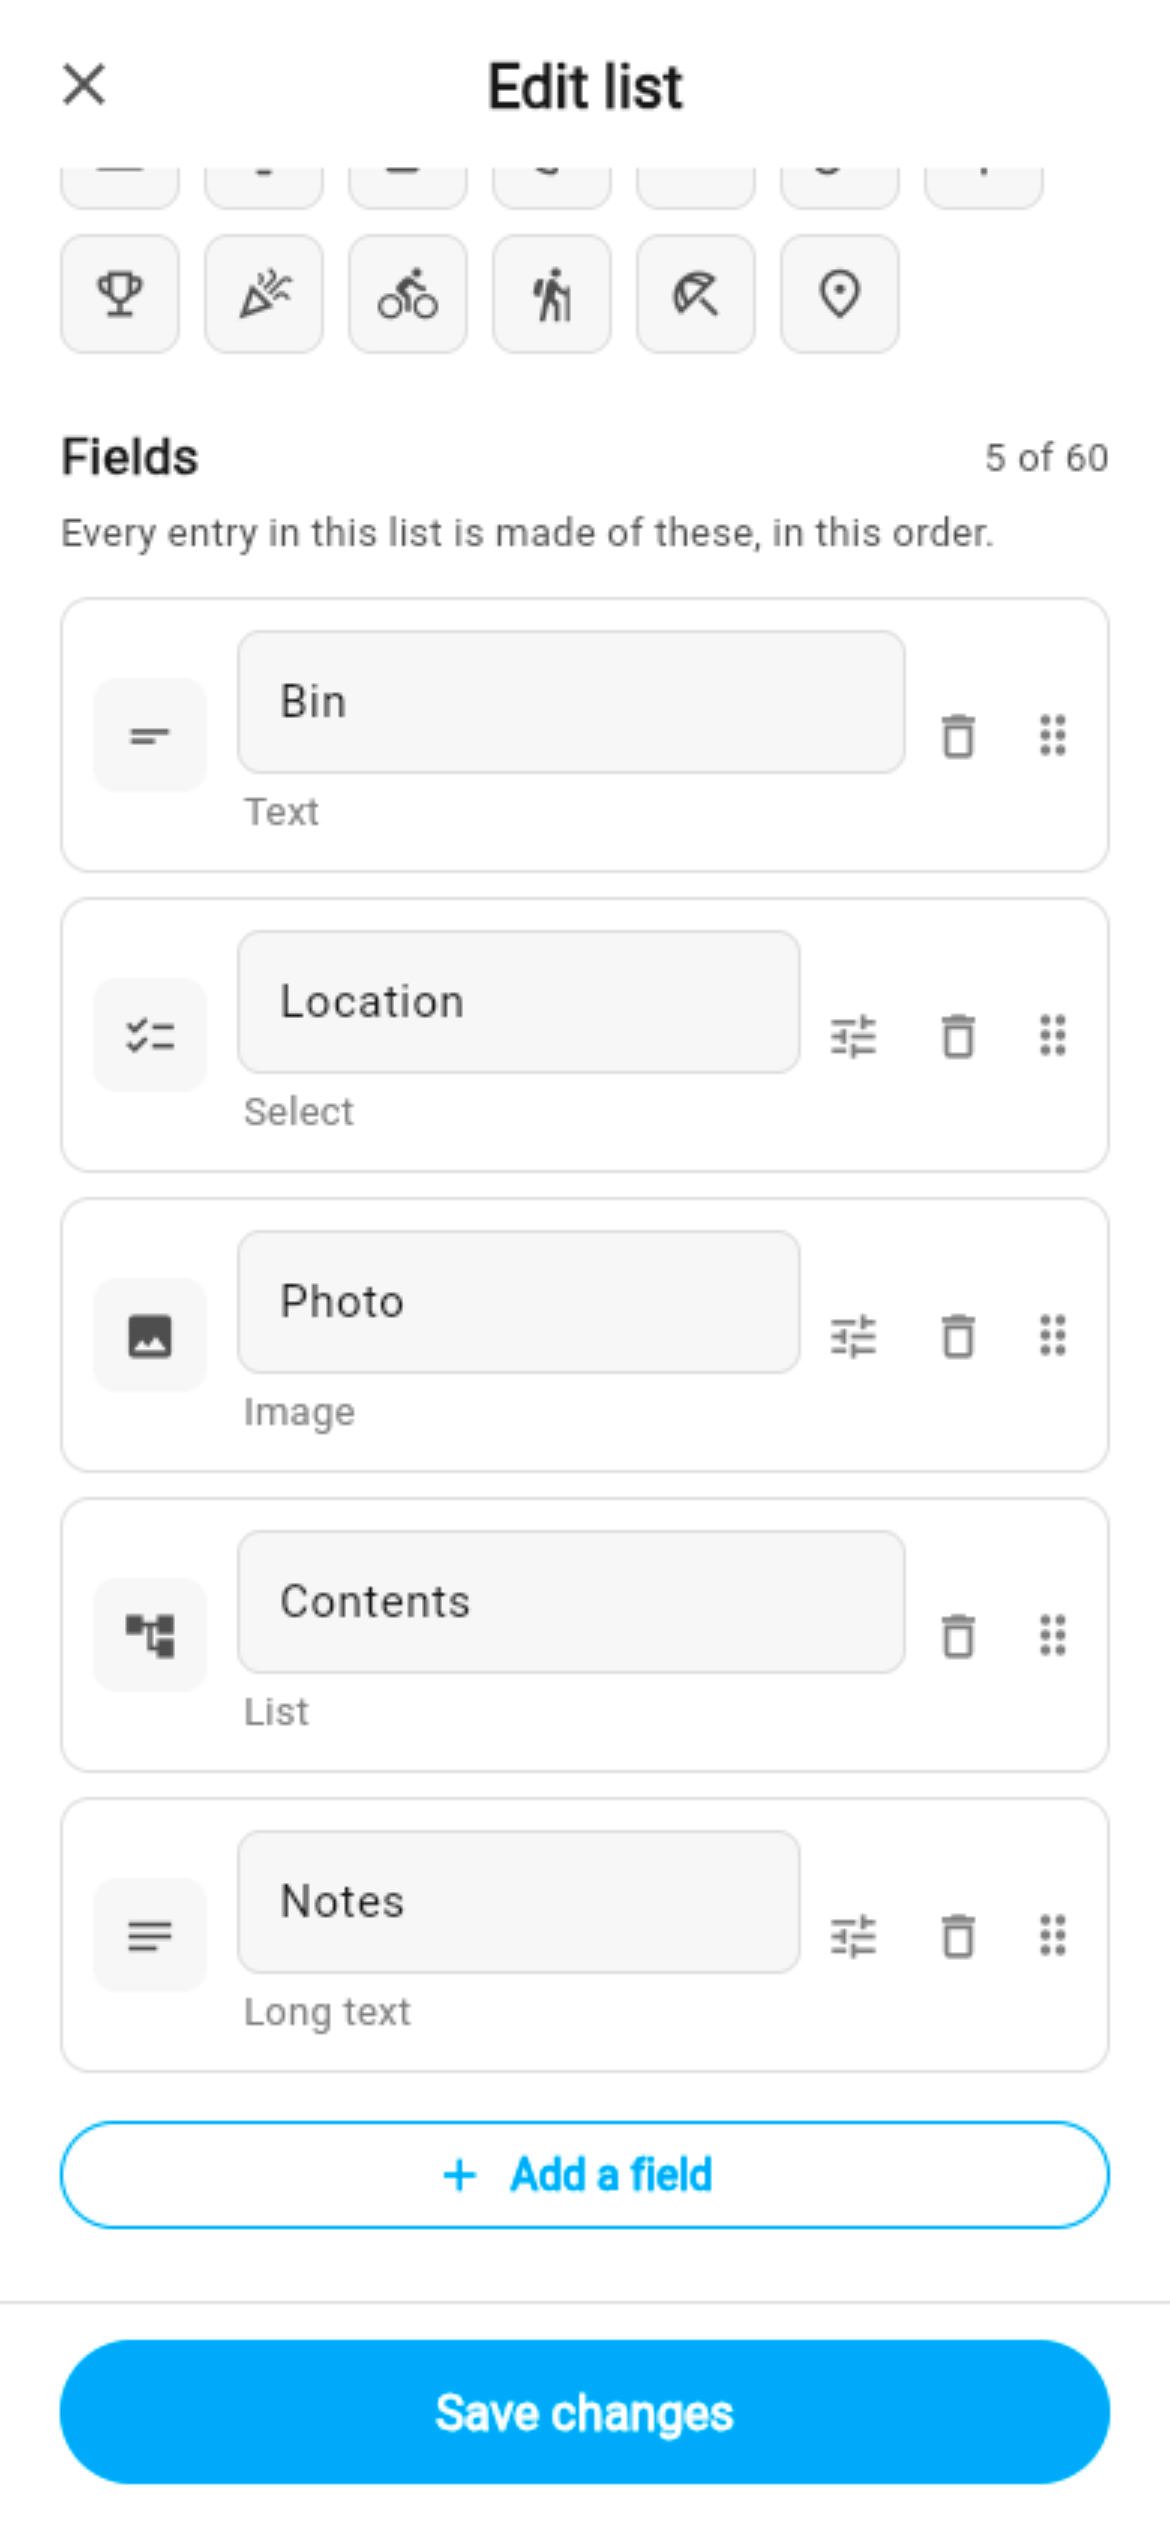
On your home screen press New list, then Start from scratch. Call it Storage Bins, pick a colour and an icon if you like, and give it these fields:
| Field | Type | Why |
|---|---|---|
| Bin | Text | The bin's name or number — “Bin 14”. The first text field titles the entry, so this is what you see on the tile and on the label. |
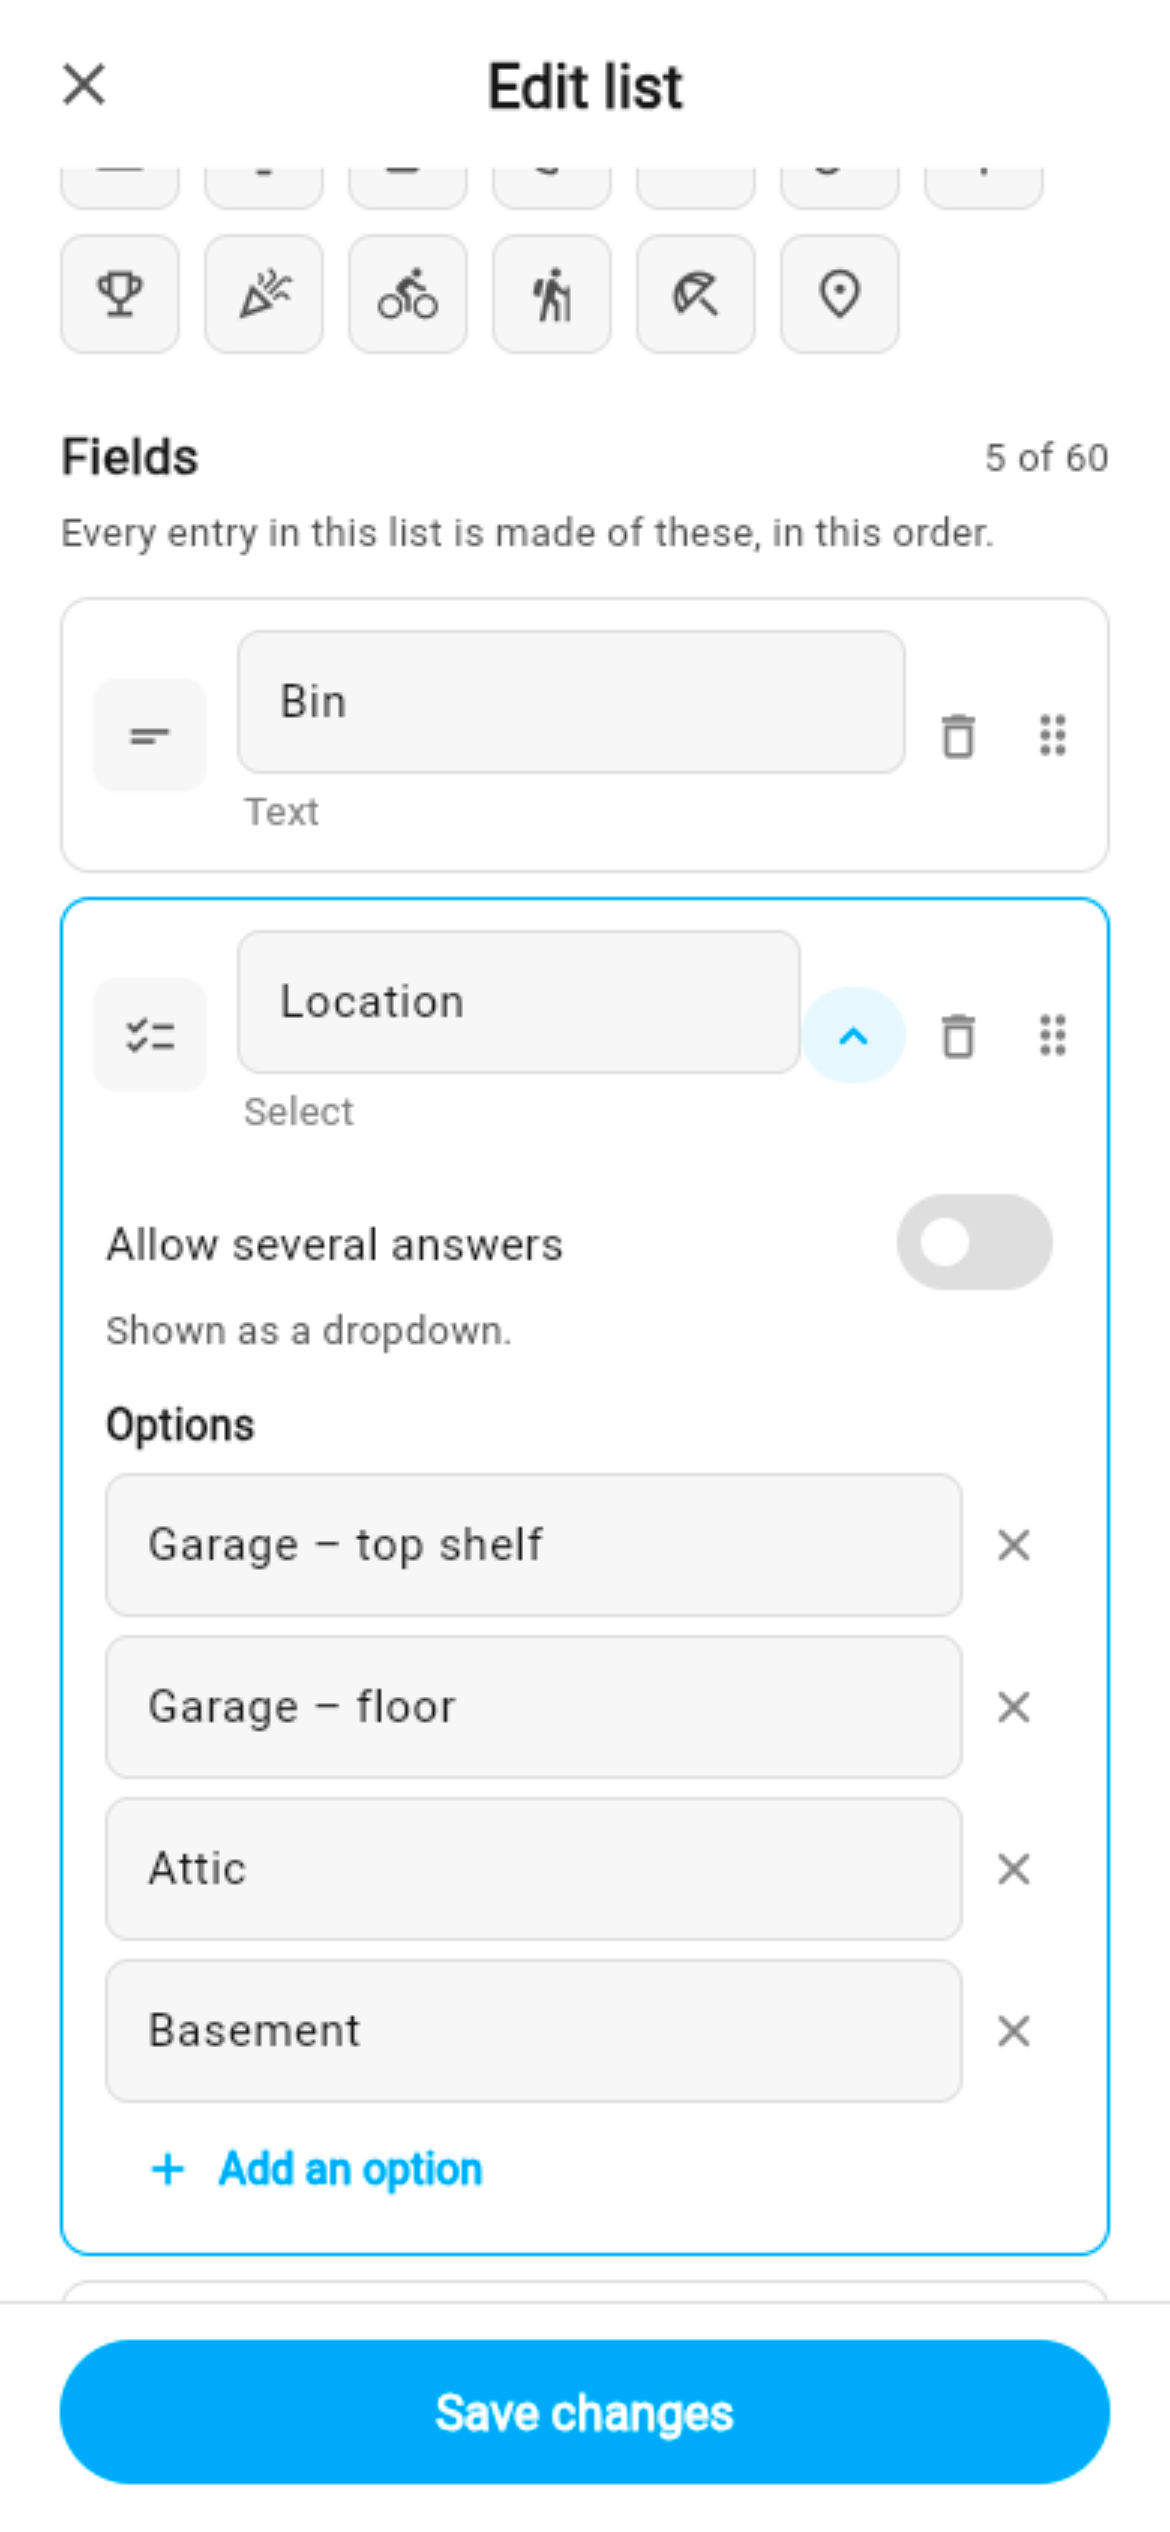
| Location | Select | Your own options: Garage – top shelf, Garage – floor, Attic, Basement. One tap to answer, and you can filter by it later. |
| Photo | Image | A picture of the bin with the lid off. Worth more than any description. |
| Contents | List | A whole list, nested inside the entry. This is where the items go. |
| Notes | Long text | “Fragile”, “Goes to storage unit in spring”, anything that does not fit above. |
Why a nested list and not a Long text field of items? Because a list is searchable item by item, can have a photo per item, and can be sorted. A paragraph of “lights, cords, timer, tinsel” is none of those things — and the day you take the timer out of the bin, editing a paragraph is how it drifts out of date.
Step 2: Add a bin
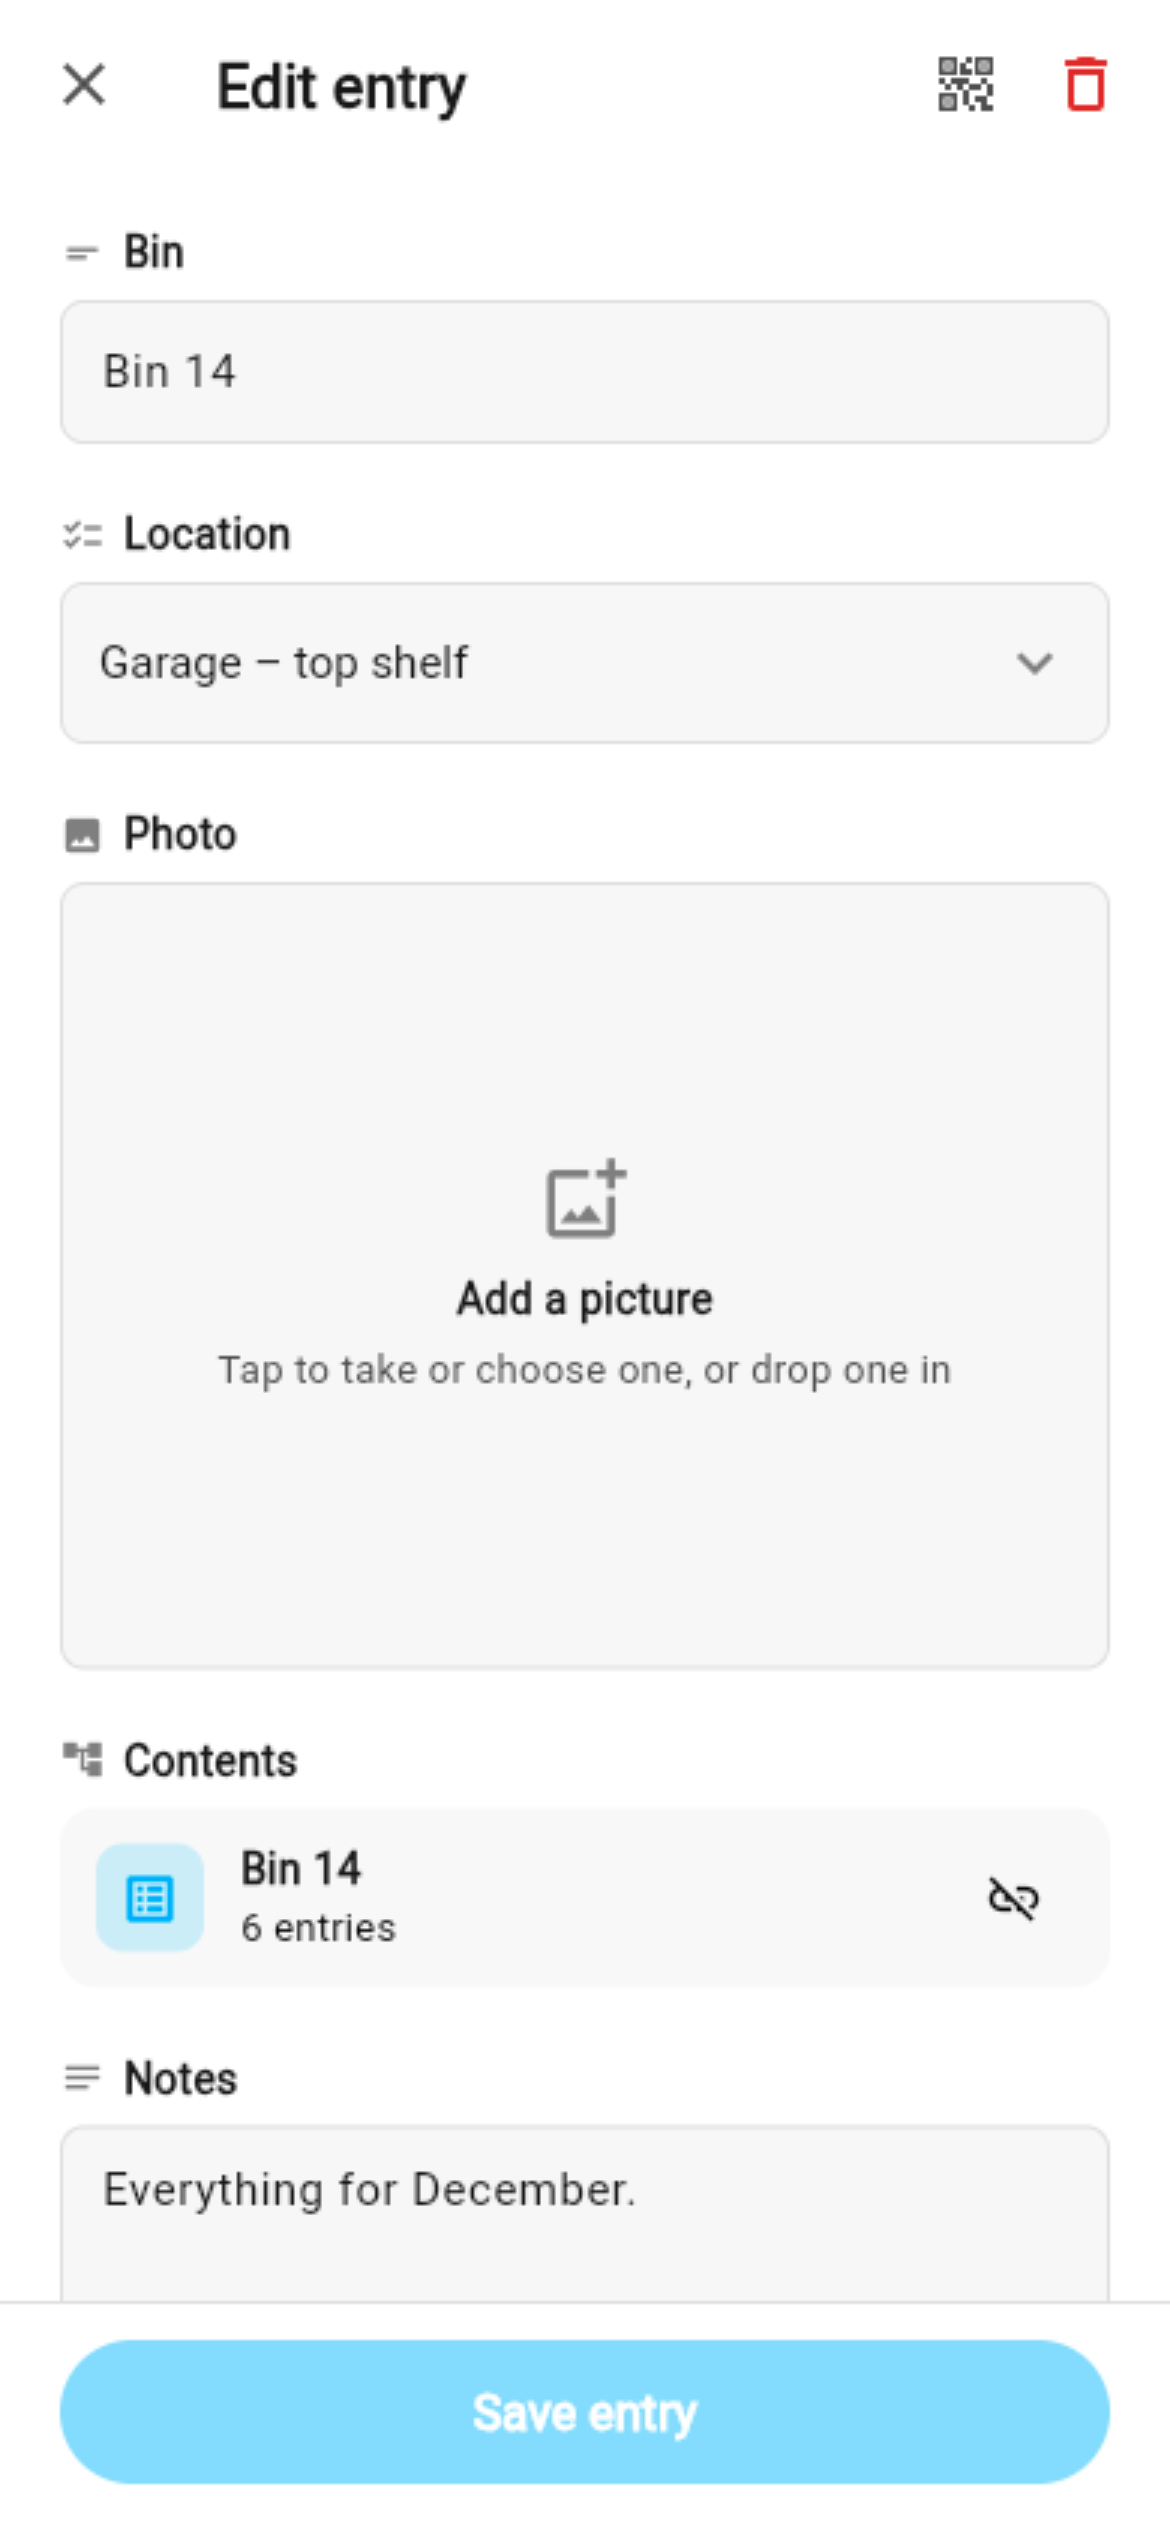
Press Add entry. Type the bin's name, pick its location, and take a photo of it with the lid off — the Image field offers the camera directly on a phone. Save it.
Now open the entry again. The Contents field offers two buttons: New list and Existing. Press New list. Lyztin offers to call it Contents; name it after the bin instead — Bin 14 — so that search results and breadcrumbs say which bin they mean. It is created nested inside this entry, with a single Name field, and opened.
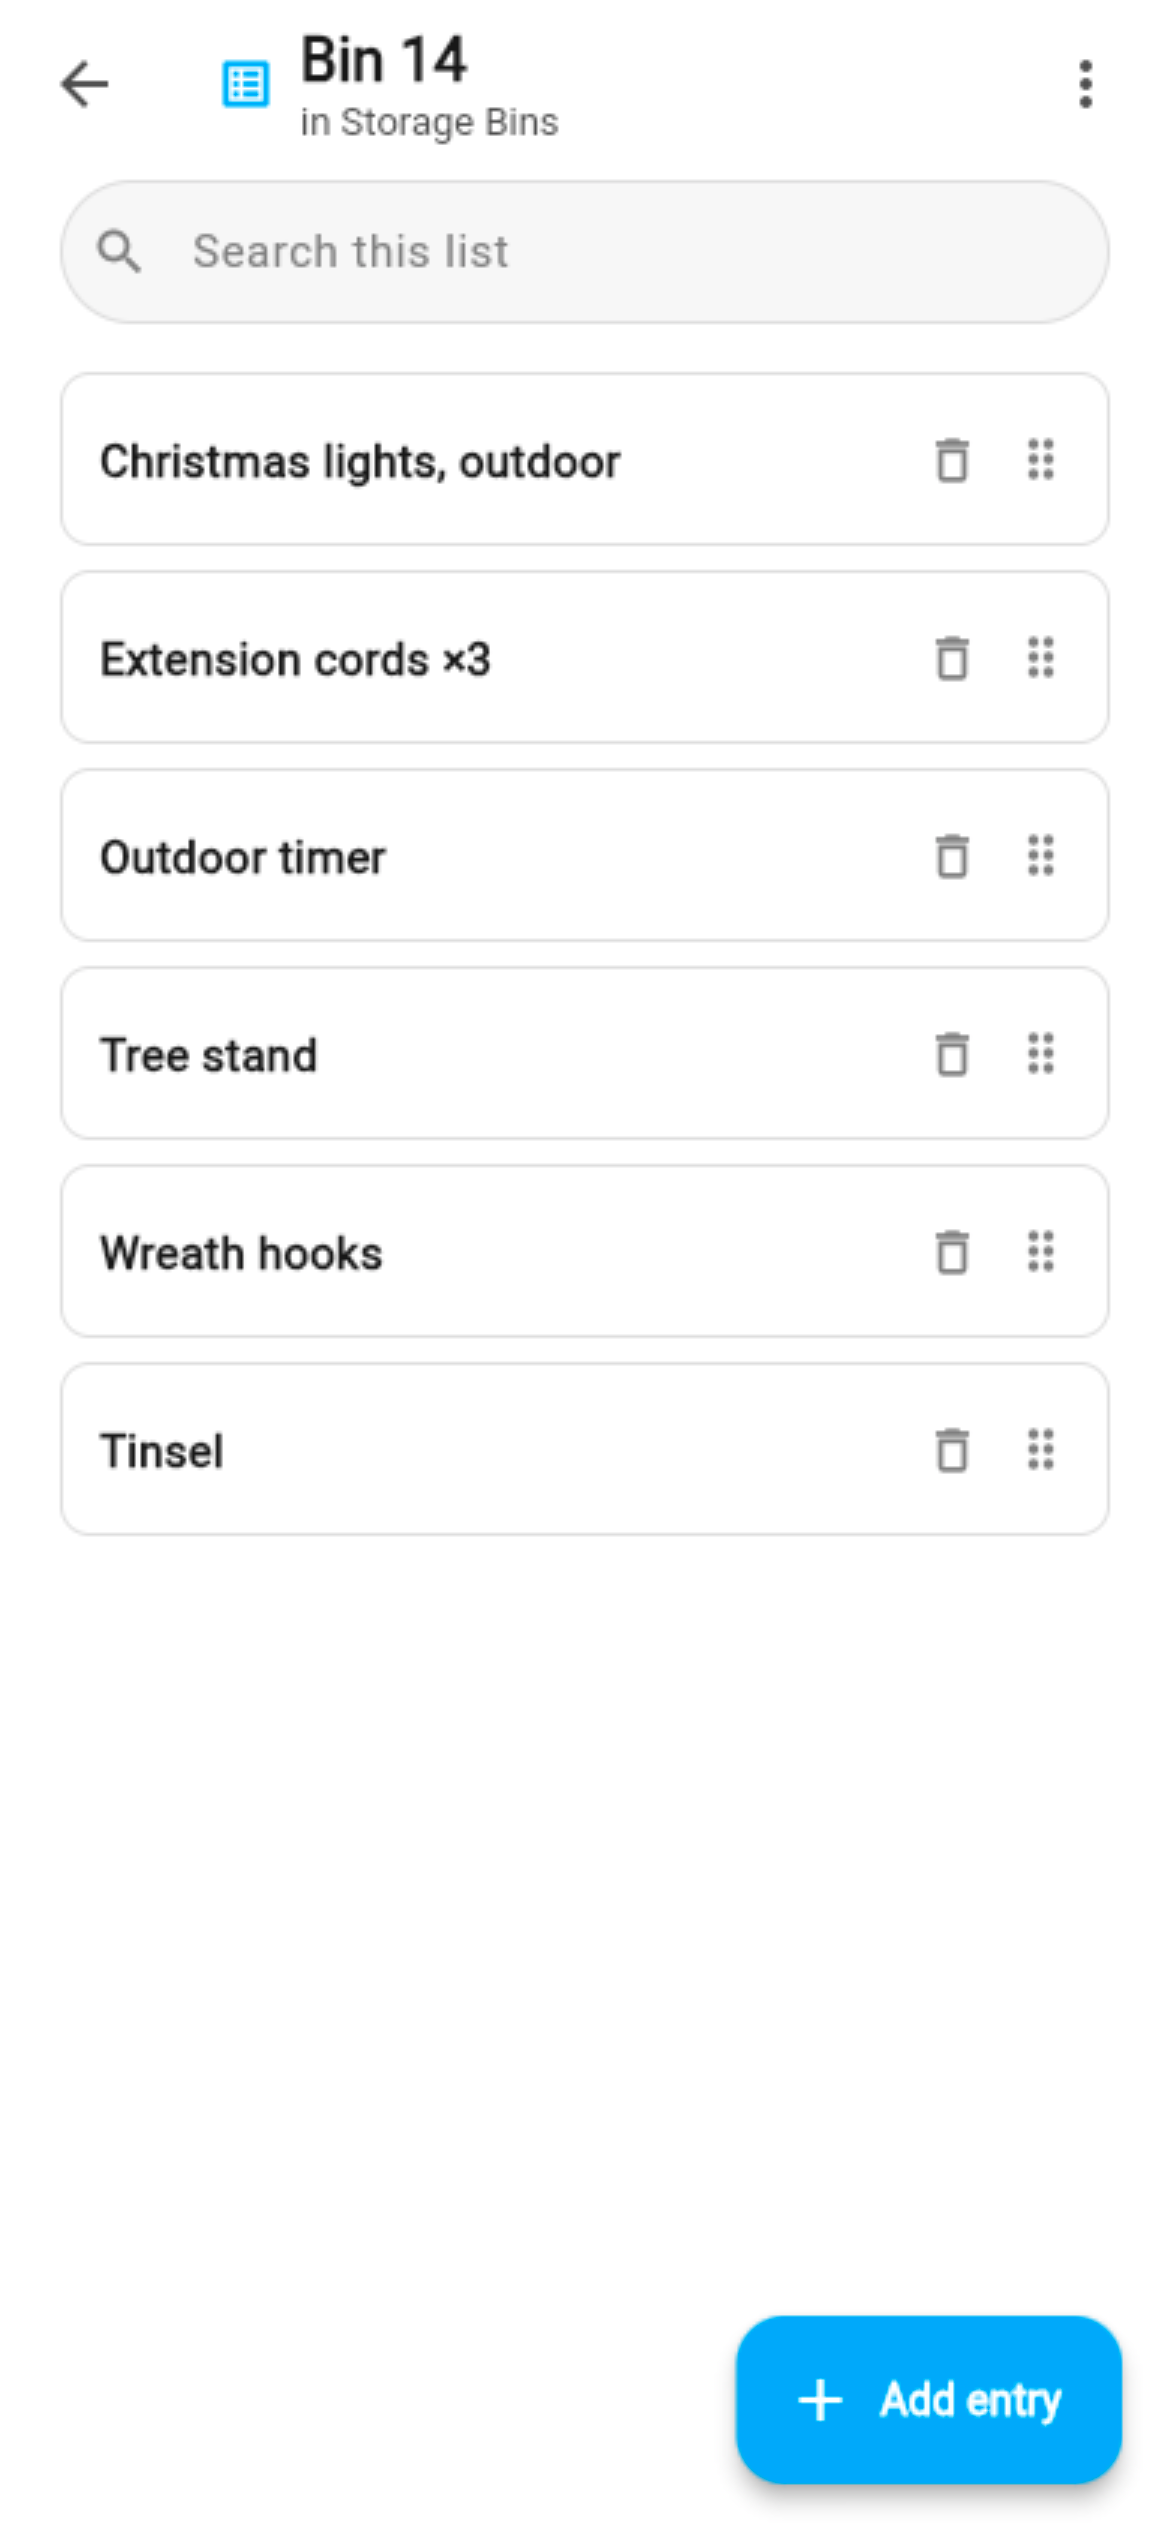
Add an entry per item. This is the minute-per-bin part, and it is the minute that pays for everything else: “Christmas lights, outdoor”, “Extension cords ×3”, “Outdoor timer”. Done. The back button takes you to the bin, not to the home screen.
Want more than a name per item? Open the nested list's menu and choose Edit list. It is an ordinary list, so you can add a Photo, a Quantity, a “Still here?” toggle — whatever you want to know about the things inside. Each bin's contents list is separate, so you can do that only for the bins where it matters.
Step 3: Print the labels
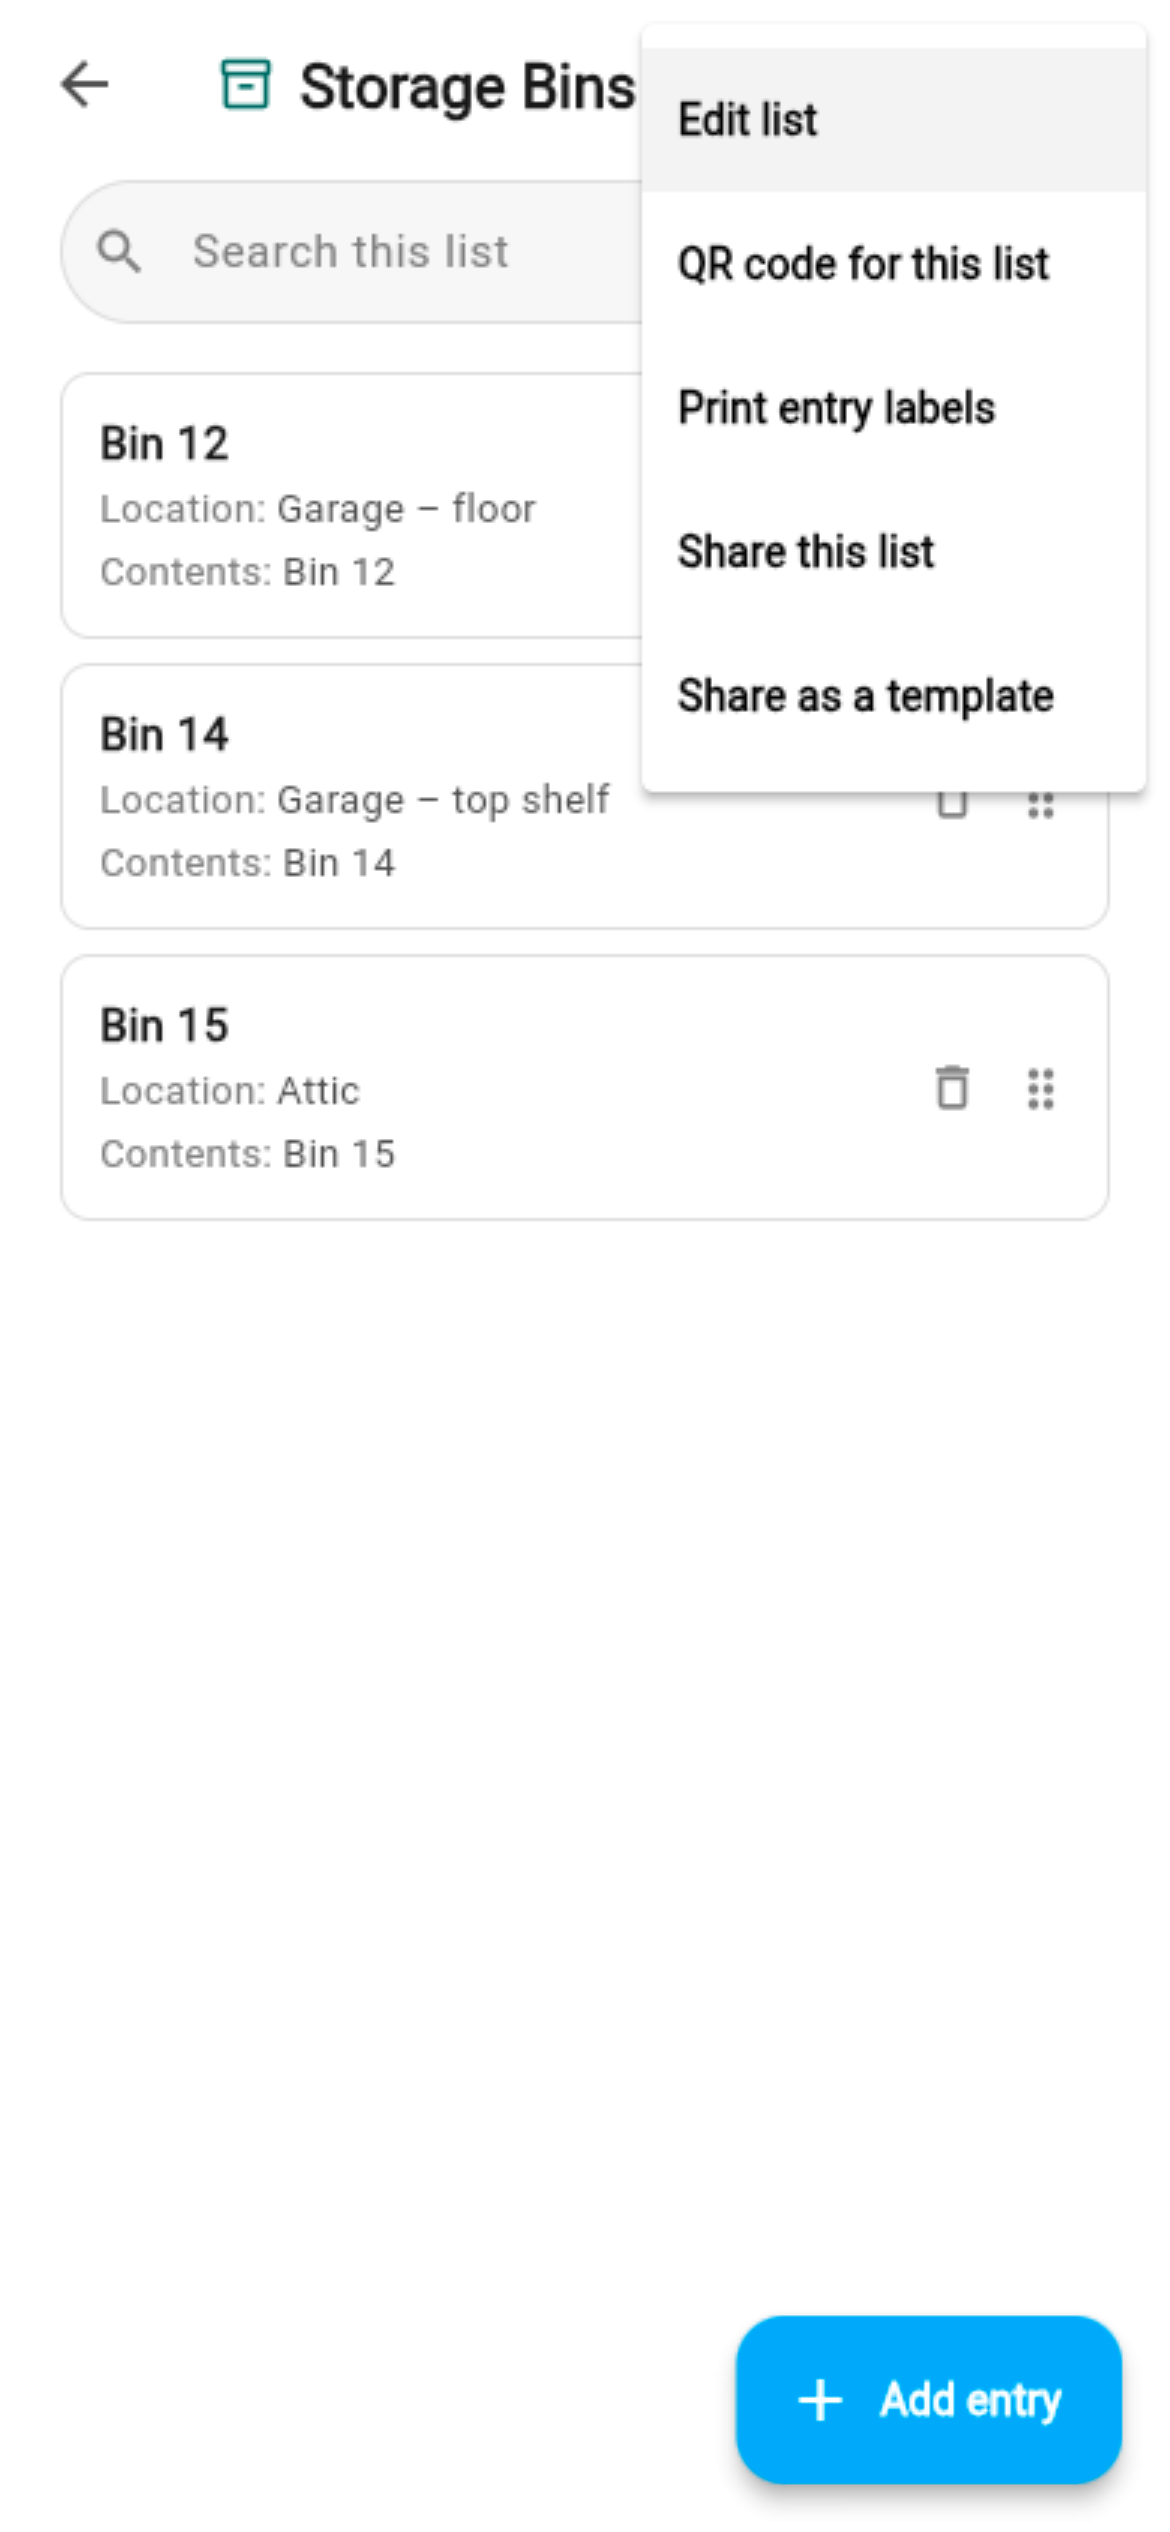
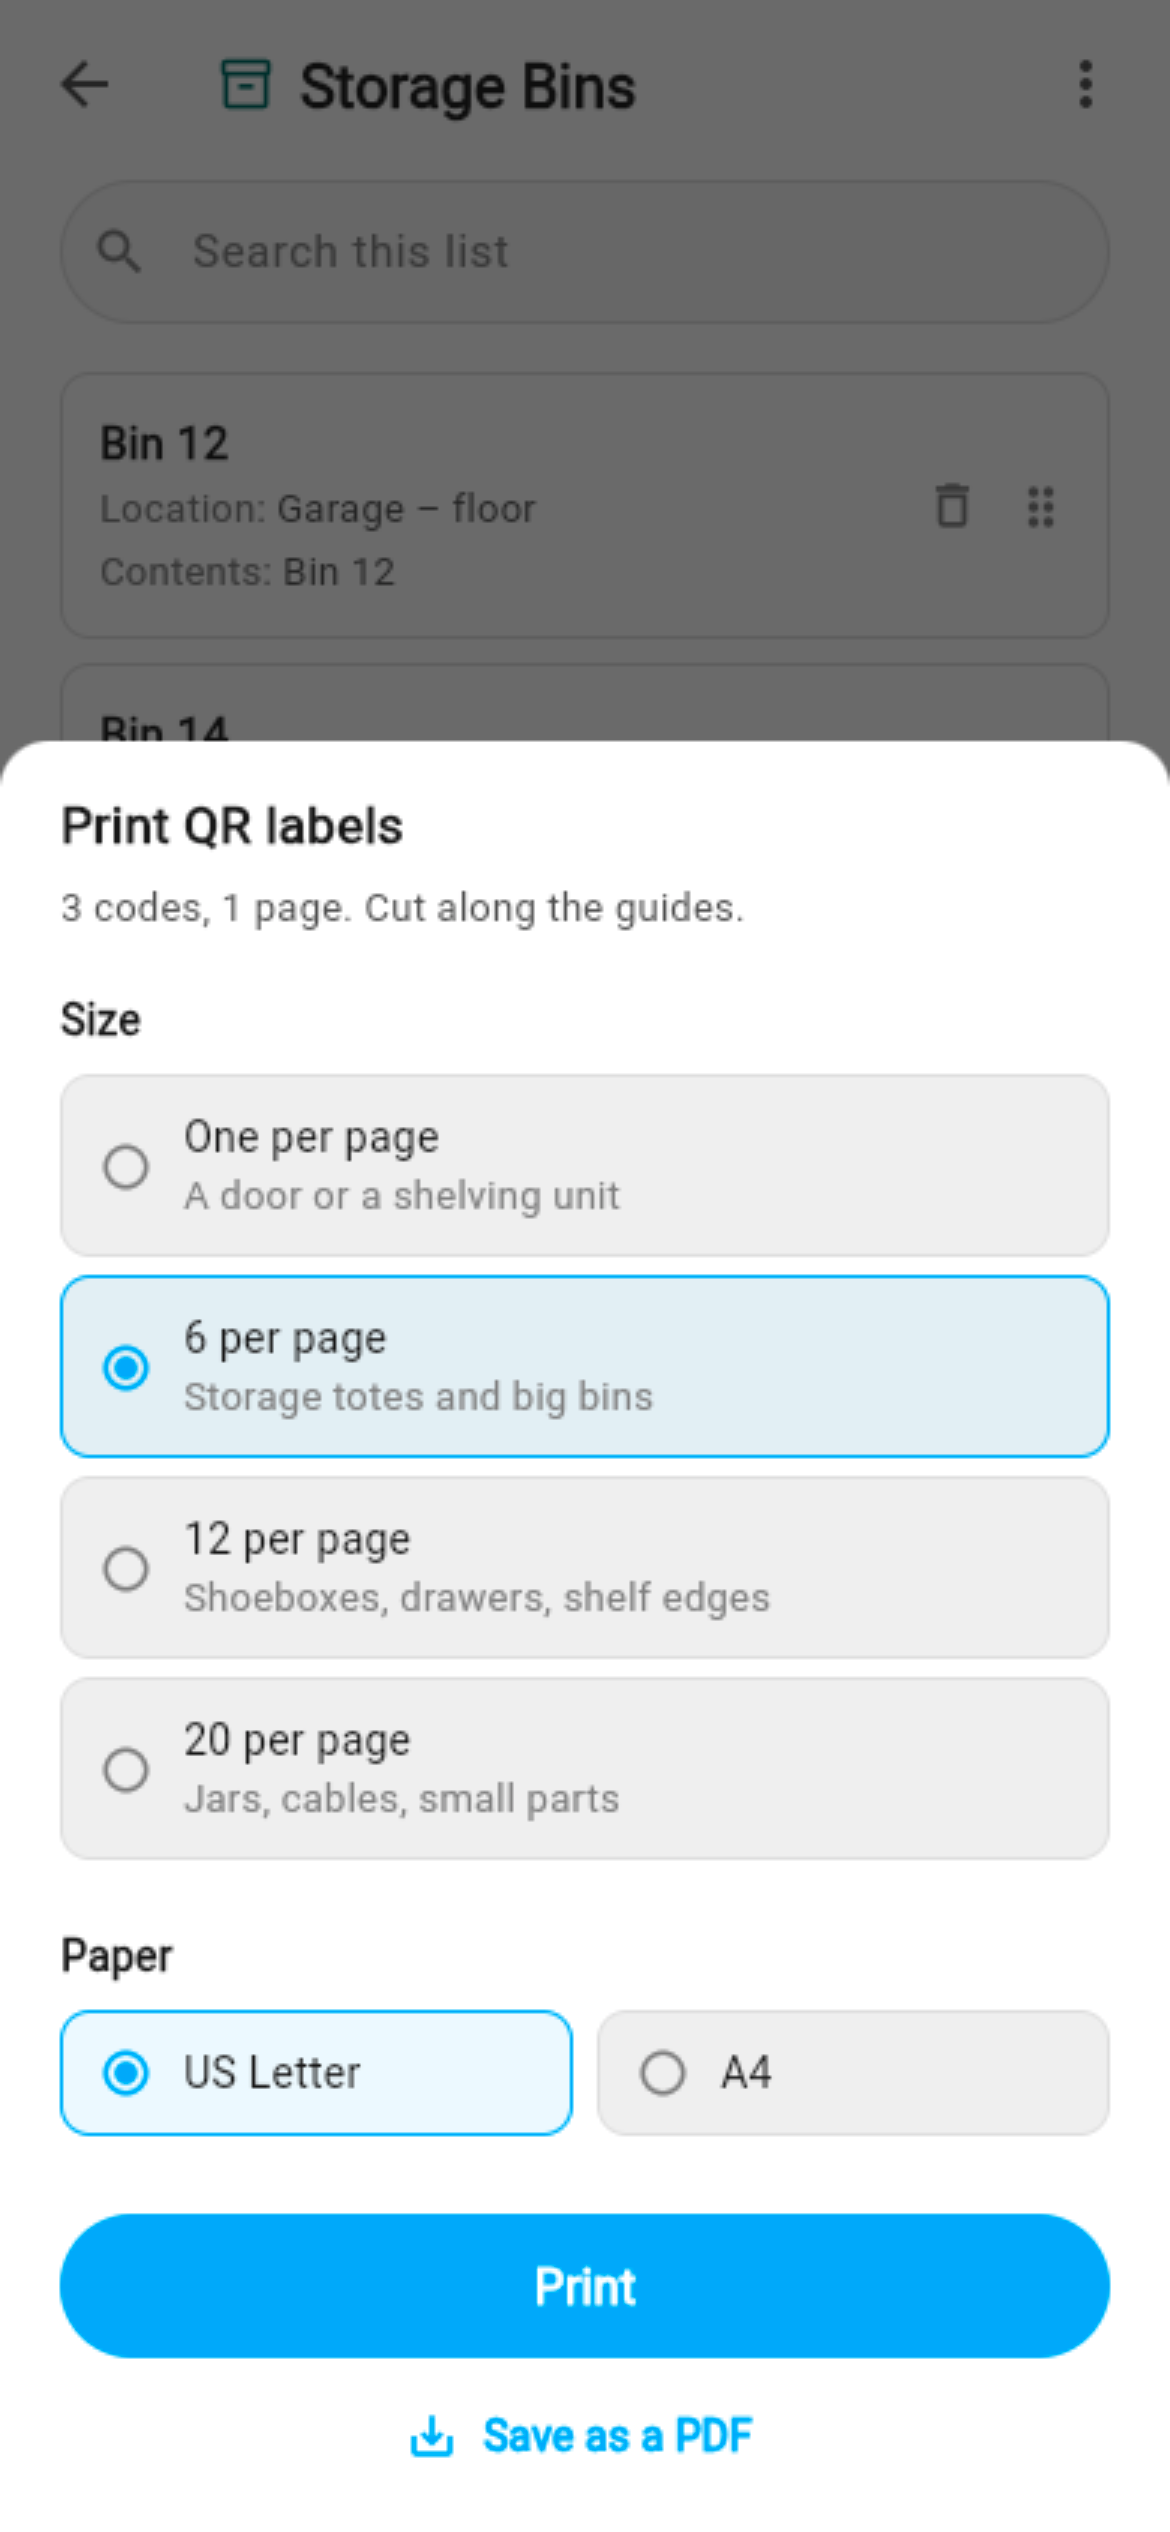
Back on the Storage Bins list, open the menu in the top right and choose Print entry labels. Lyztin builds a PDF with one QR code per bin, each captioned with the bin's name, and offers it to your printer — or saves it as a PDF you can print anywhere.
Choose a paper size and a label size. Small labels get a lot of codes on one sheet; big ones are readable from across the garage. Cut along the guides, and put one on each bin.
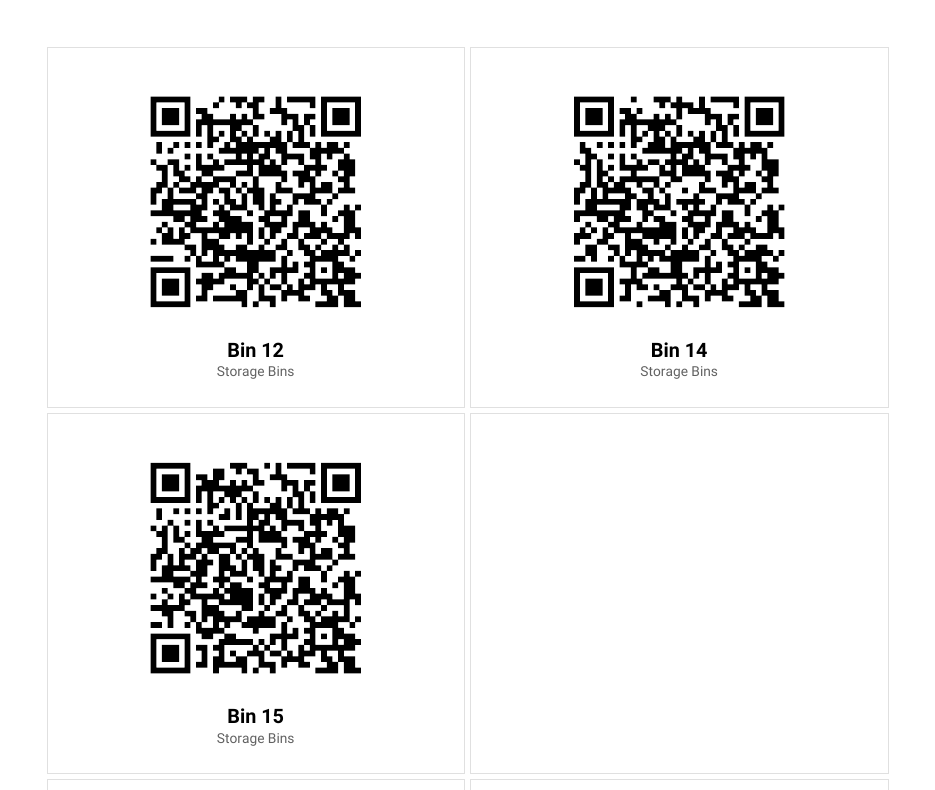
Two things about these codes are worth knowing:
- They are private. A code addresses an entry in your account. Somebody else scanning it is asked to sign in, and then sees their own lists, not yours. The label on the box gives nothing away.
- They survive edits. The code names the entry, not what is in it. Move the bin to the attic, change its contents, rename it — the sticker still opens the right entry. You only reprint if you throw the bin away.
Labels honour whatever you are looking at. Search the list for “Attic” first and Print entry labels prints labels for the attic bins only.
Step 4: Scan
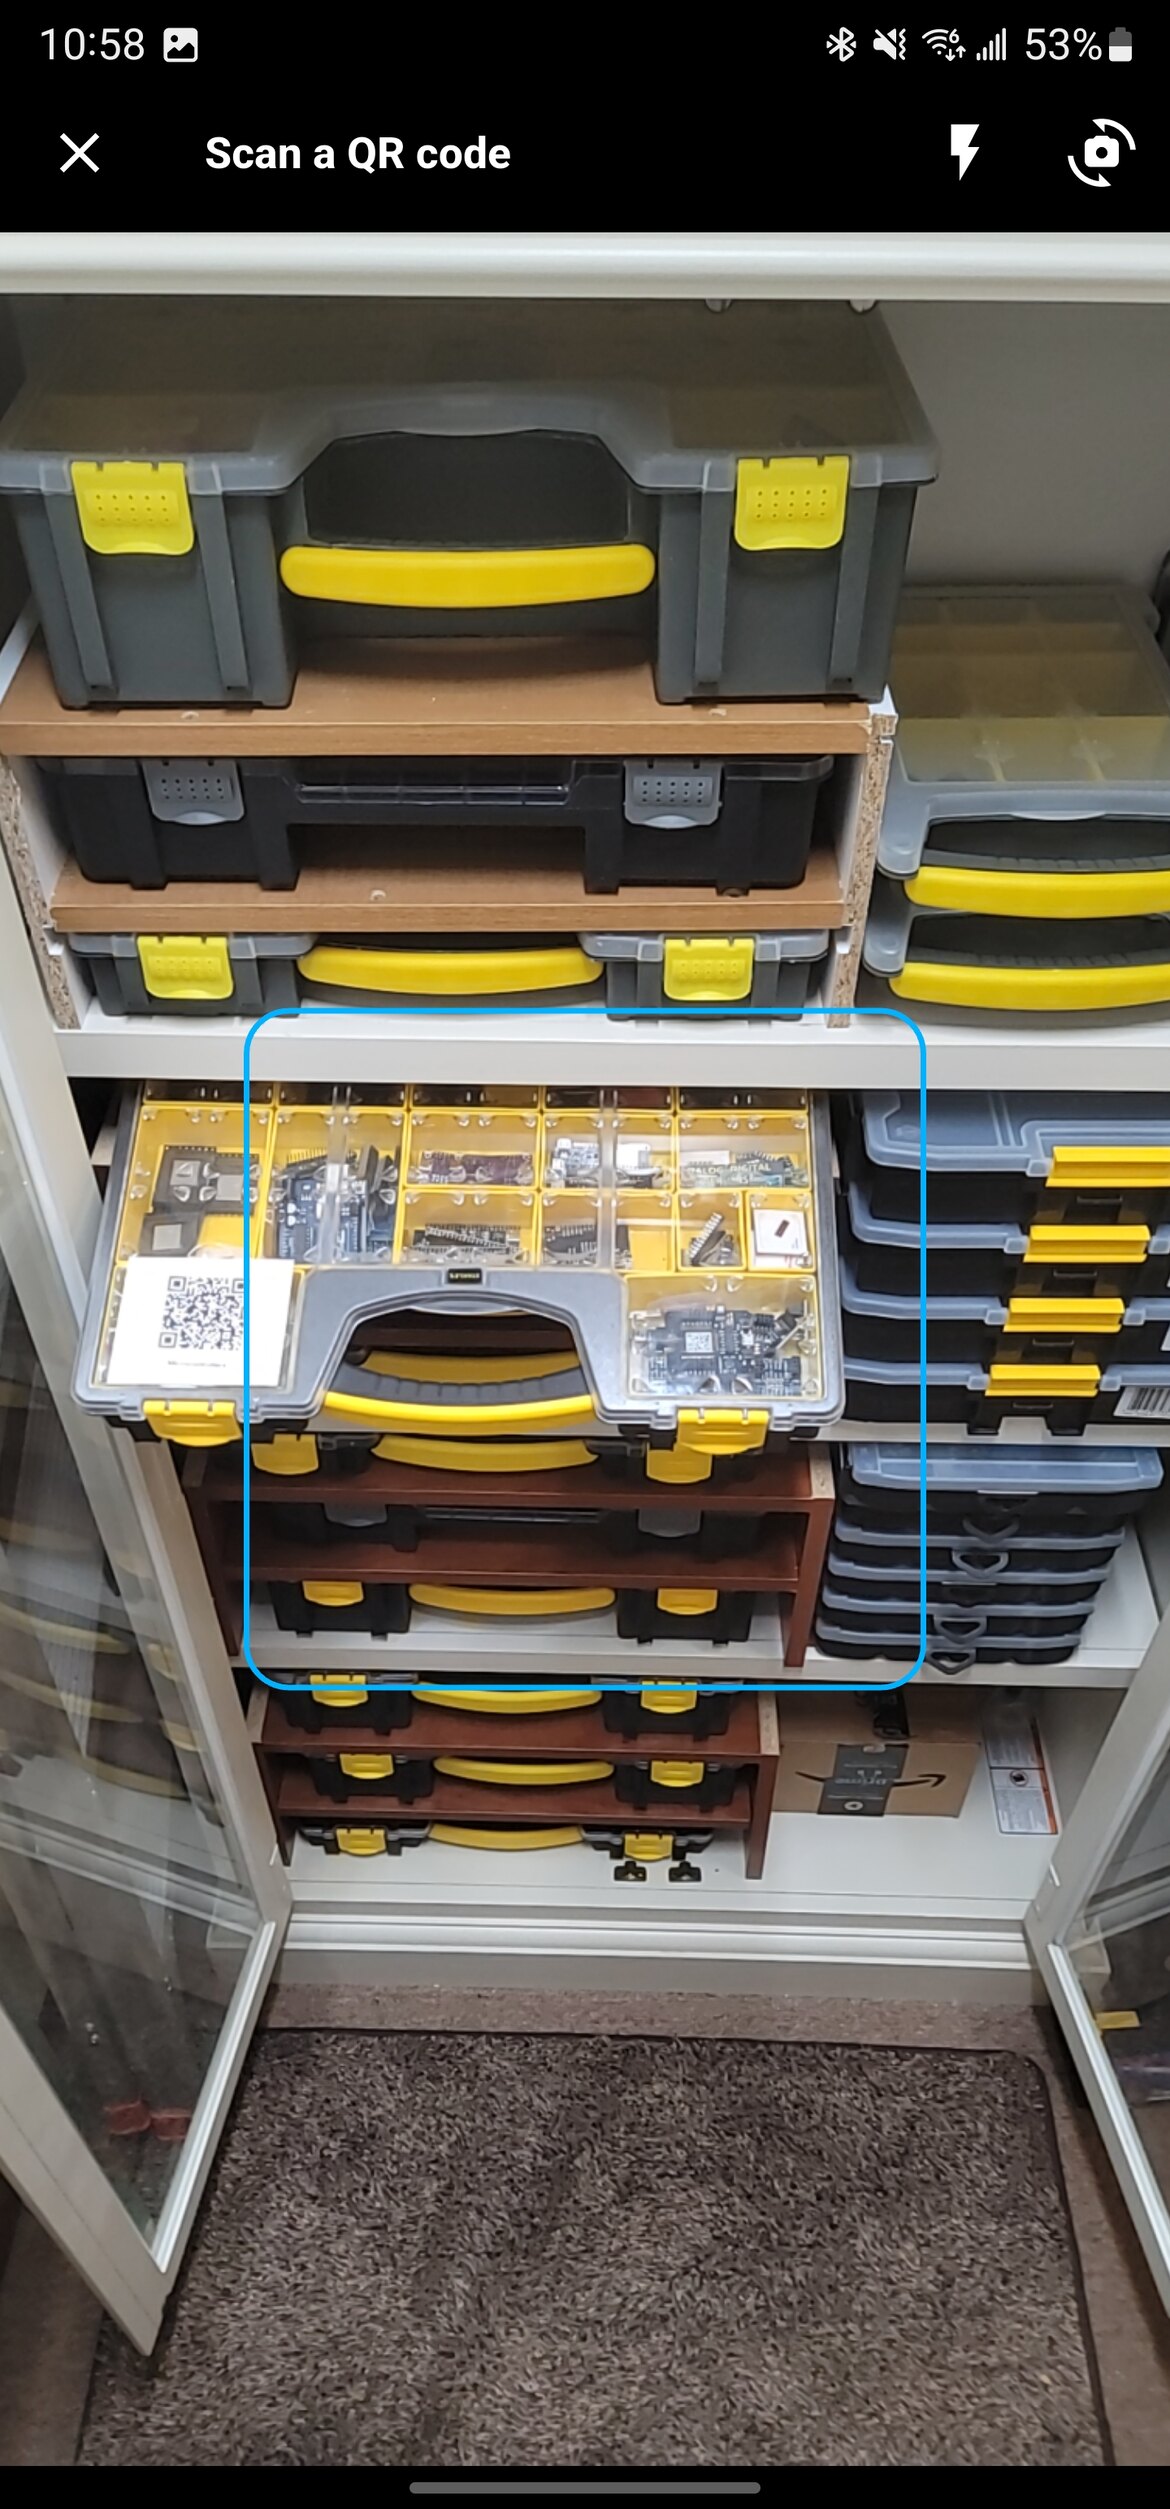
Point your phone's ordinary camera at a label. It opens the Lyztin app on that bin — photo, location, contents. Or, from inside the app, press the scan button on the home screen; it is the same camera, without leaving Lyztin.
If you want a scanner on your home screen, the Lyztin scan widget is one tap from lock screen to camera.
Step 5: Find things
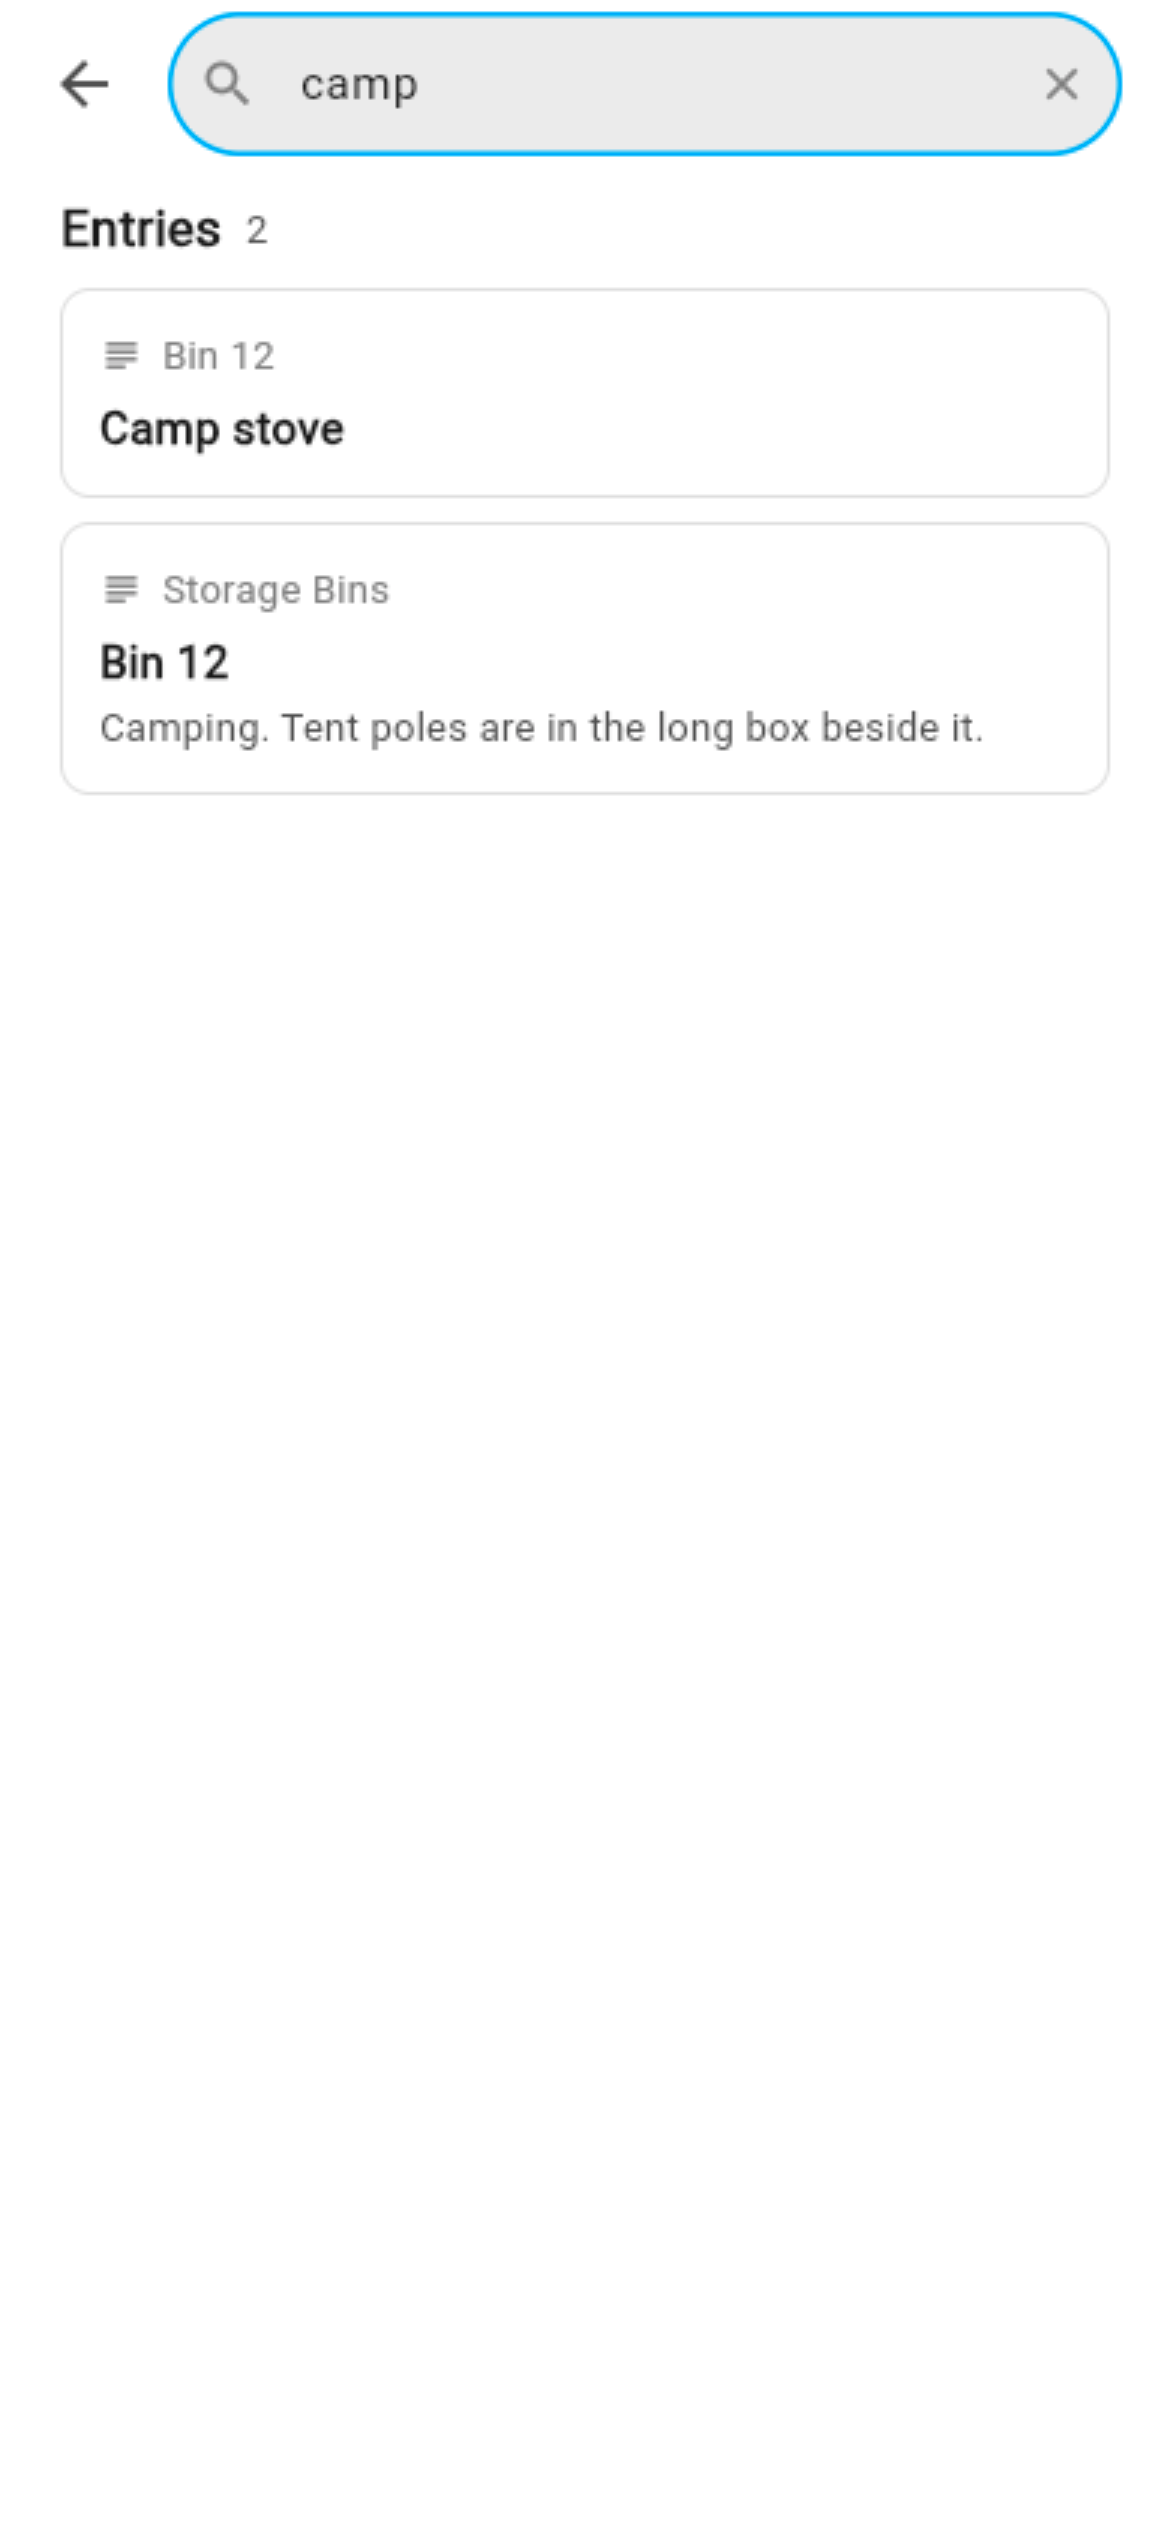
This is the payoff. Search on the home screen finds entries in every list you own, including the nested ones. Type “camp” and the results are Camp stove, in Bin 12 — and Bin 12 itself, because its notes mention camping. Open the item and the breadcrumb says where it lives. Pull Bin 12.
Or just ask. If you have connected Claude, “which bin has the camp stove?” gets you the same answer in a sentence.
Variations
- A storage unit. Add a second Select — Which unit — or nest another level: a Storage Units list whose entries are units, each holding a Bins list. Lists nest five deep.
- Moving house. Number the boxes, put the destination room in the Location field, and print the labels before the movers arrive. On the other end, scanning a box tells you which room it goes to without opening it.
- Shared with a partner. A shared link makes the list readable by anyone who has it — but the labels stay private, so a public QR code needs the public link. Both are on the list's QR code menu item.
- Emptying a bin. Delete the bin's entry and Lyztin will tell you it is about to set its Contents list free rather than delete it: the list comes back to your home screen, whole, and you decide what to do with it.